|
This makes a beautiful, full, 9
inch pie which will earn you praise!
- 6 Large Apples (Golden Delicious or Criterion are
excellent)
- Use more apples if they are small. You want about 6-
cups raw apple pieces for this pie
- 1/3 cup Brown Sugar
- 1/3 cup White Sugar
- 1 tsp. Cinnamon
- 1/2 tsp. Nutmeg
- 3 tablespoons instant tapioca
- 3 tablespoons cornstarch or arrowroot flour
Slice
the apples into 12 wedges, and cut each wedge in half (like a chunk, not a
thinner slice). Mix the sugars, spices, cornstarch and tapioca together.
Gently stir in the sugar mix, being sure the slices are well coated. (I
like to do this in my plastic cake keeper cover - it is deep enough to mix
and stir without spilling.)
Gluten
Free Flaky Pie Crust
While
searching for a better gluten-free pie crust, I found this basic recipe on
the Land O Lakes website. So, of course, it has butter in it. And it is
good. But when I needed a pie crust that was gluten-free (for me), and dairy
free (for grandsons) and apple-cider free (for daughter-in-law), I
made modifications to the recipe. Remembering how flakey and tender pie
crusts were pre-gluten-free when I increased the fat content, I made that
change as well. And this tweaked recipe made the absolute best crust ever;
tender, easily handled, and flakey, too. So here is the new, improved
recipe.
The
flour mix [no changes here, but I make a batch three times this quantity and keep it in a special
container just for making pie crusts].
Mix
together well:
2
cups white rice flour (I prefer Bobs Red Mill brand; it is finer than many
others) [6 cups]
2/3 cup
potato starch [2 cups]
1/3 cup
tapioca flour [1 cup]
1
teaspoon xanthan gum [1 tablespoon]
For
the pie crust:
|
9 inch Single Crust
|
Ingredient
|
9 inch Double Crust
|
|
1 1/4
cup
|
Flour Mix
|
1 7/8 Cup (take 2 tbls
out of second full, level cup)
|
|
1 tablespoon
|
Sugar
|
1
1/2 tablespoon
|
|
1/2
teaspoon
|
Xanthan gum (yup, in addition to what is
in mix)
|
3/4
teaspoon
|
|
1/4
teaspoon
|
Salt
|
3/8 teaspoon
|
|
10 tablespoons
|
Crisco (COLD!!)*
|
1 cup
|
|
1
|
Large egg
|
1
and a half large
egg (or 1 egg + 2 Tbsp egg beaters)
|
|
3 tablespoons
|
Ice cold water
|
4 1/2 tablespoons
|
|
1/4
teaspoon
|
Rice vinegar
|
3/8 teaspoon
|
Tip:
All gluten-free bread recipes require the
fat be cold. I buy Crisco in the 3 pack of 1 cup bricks. I keep this in the
freezer so it will be cold whenever I need it. It does not freeze solid but
will be cold enough to work into your recipe.
Directions:
- Measure all the dry ingredients into a
bowl and stir together well. Use a different bowl to mix your pastry
dough in.
- Put about half cup of water in small
measuring cup and add a few ice cubes. Let it sit while you work the
Crisco into the flour.
- EASIEST way to mix Crisco into flour
mix: put one third of the flour mix into the bowl you will use to make
the dough. Using a cheese grater, grate about a third of the
just-out-of-the-freezer Crisco you need over the top of the flour. Put
half the remaining flour on top of the Crisco and grate half the
remaining Crisco onto it. Repeat with remaining flour and Crisco. This
keeps the fat from globbing up. Using a
pastry cutter, blend the fat into the flour until the mixture
resembles coarse crumbs. (I had to learn to stop when the crumb pieces
were coarse; over-mixing contributes to tough crusts).
- Measure the correct amount of icy
water into a small bowl. Lightly beat in the egg and vinegar. Add to
flour/Crisco mix JUST until dough is formed. Here again, over-handling
will contribute to tough crusts.
- For double crust, divide into 2 balls
(one, for the bottom crust, can be a bit larger than the other).
Flatten each into a 1 inch thick disc, and wrap in plastic wrap. Let
dough rest for a minimum of an hour. (I try to make the crust the
evening before I make the pie and let it stay refrigerated
over-night.) This is because gluten-free flours need time to absorb
the liquid in the recipe.
- Take the dough out of the fridge about
15 minutes before you want to roll it out. You will need two large
pieces of plastic wrap (I have the usual from-the-grocery-store
variety so I need to overlap two pieces to make it wide enough, so for
me, that means four pieces of plastic wrap.)
7. Lightly spritz your countertop with water
then lay out the plastic wrap smoothly. This keeps it from bunching up or
sliding around. Place one dough disc in the center and cover with the rest
of the plastic wrap. Roll out until it is a 14 inch circle. Place your pie
pan beside the dough (but not on the plastic wrap). Remove top plastic
wrap. Gently lift the lower plastic wrap on one side so you can get your
hand and forearm under it, near the center of the dough. Holding the
plastic wrap across your hand and forearm, lift the dough and plastic wrap
and lay across the pie pan, dough side down. With the plastic wrap still on
the dough, gently adjust the dough so it fits evenly in the pan, and up the
sides. Then remove the plastic wrap. Trim the excess crust at the edge of the
pan (these pieces are so good sprinkled with cinnamon and sugar and baked). If you
"paint" the raw surface of bottom pie shell with some egg white
and let it dry before filling the pie, the pie crust is less likely to get
soggy from the filling. Do this gently with your fingertips or a very soft
paint (pastry) brush, being careful not to tear or slice the dough with
fingernails.
8. Turn the oven on
to preheat at 425 degrees. Roll out the
remaining dough for the top crust. This
crust needs only be about 11 inches across.
9. Pour your pie filling into the bottom pie shell,
spreading the apples evenly. Paint the flat outer edge of the pastry with
the remaining cold water, then lift the top crust
onto the pie with the plastic wrap as you did before. Trim the top crust
even with the edge of the bottom crust, then press to seal. If you don't
have a favorite method, my mother's technique is pretty and simple. With
your pointer and middle finger of the right hand far enough apart to put
the left pointer finger between them, press down on the crust with the pads
of the finger, not the tips. With the right two fingers still on the pie
dough, put your left pointer finger between them and far enough through
them to touch the edge of the pie pan. Gently pull the folded edge of the
dough one half inch toward the center of the pie, then
press down. Move your right fingers so the pointer finger is sitting on the
impression the middle finger just made, and repeat. Do this all around the
pie shell. It will be sealed and pretty.
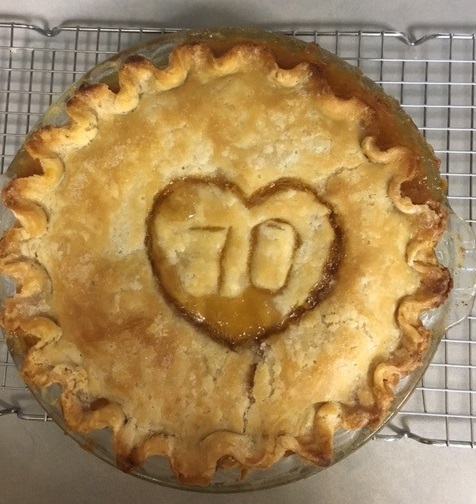
10. Slice a design in the top crust for
ventilation. This
allows the steam to escape, so the hot liquid does not pop a hole in the
pie crust to vent. As long as you are doing vent holes, make a pretty
design - a design of short slashes - in the shape of an apple, or a heart, or three stalks of wheat, for example.
11. Some people like
to coat the crust with milk, to give it a nice sheen, but this is optional.
Sprinkle lightly with sugar, and put a silicone pie shield around the pie
or make one of aluminum foil, to prevent overbrowning. Put the pie in the
oven (at 425 degrees) for 55 minutes, then turn the oven down to 350 degrees for another 20
minutes, or until the apples are tender when poked through one of the steam
vents in the crust. The crust should be lightly golden. Let cool on a wire
rack for about an hour, or the filling will be so warm it will serve up as
apple soup instead of apple pie.
If
you want a Dutch Apple Pie, use the single crust recipe above. Follow the
above directions up to the point where you are ready to trim the crust -
for this pie, trim the crust to a full inch beyond the edge of the pie pan.
Roll that inch under, so the fold in the crust matches the edge of the pan.
Then crimp the edge as you like, and paint the bottom and sides of the
dough with egg white. Use the pastry cutter to blend these ingredients:
- 3/4 cup Flour (I use the Gluten Free pie crust
flour blend)
- 1 cup Brown Sugar
- 1/2 tsp cinnamon
- 1/4 tsp salt
- 6 Tablespoons butter or margarine.
Pour
the apples into the pie shell, and bake for half an hour without the
crumbles. This creates a skin on the top of the pie so the topping does not
sink into the pie juices. Remove pie from oven and crumble this topping all
over the apples right up to the pastry. Bake the remaining time as
instructed above.
|